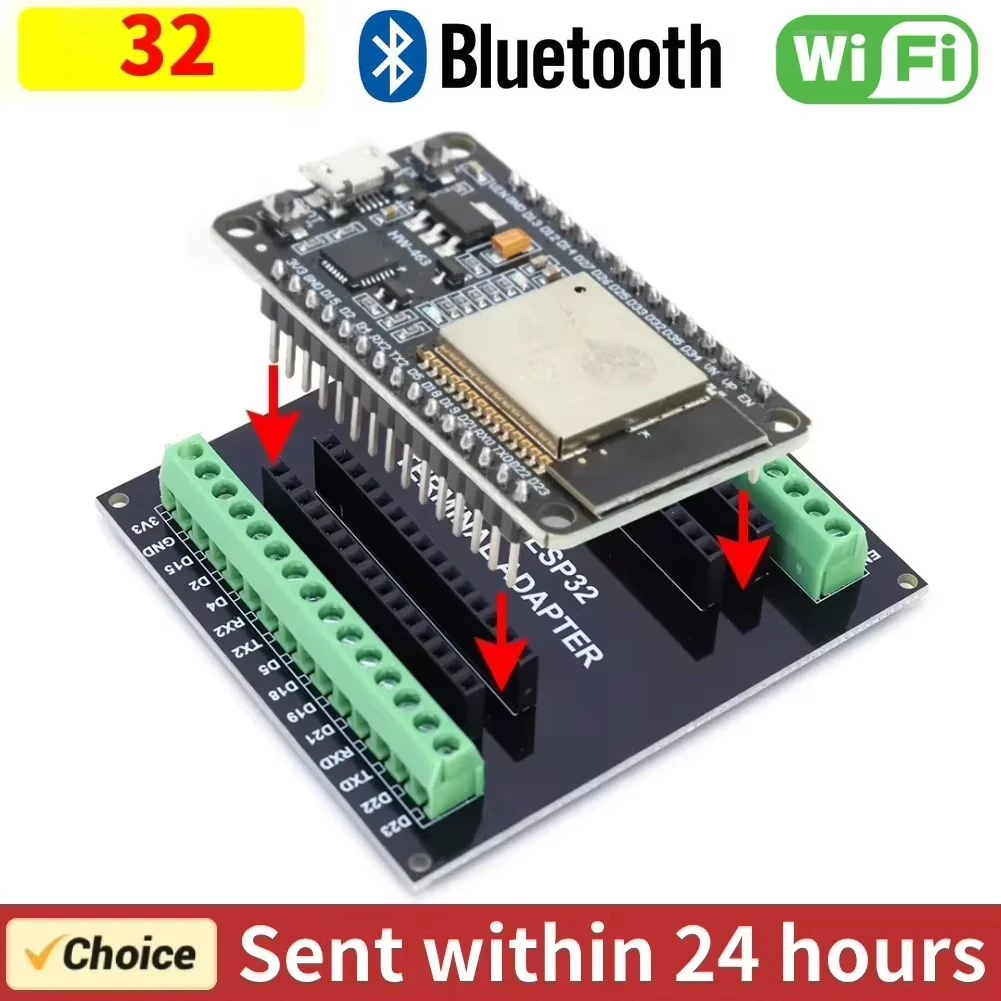
An ESP32 DevKit V1 board is the right start for a robot car. It costs $11.99, runs a dual-core processor, and gives 30 pins for motors and sensors. Add an ESP32-S3-CAM board at $11.97 when the car needs a camera, since it carries 16MB of flash and 8MB of PSRAM. Six boards follow.
Which ESP32 board suits a first robot car?
Start with the ESP32 DevKit V1 board for a first robot car. It costs $11.99, gives 30 pins, and runs WiFi and Bluetooth on 2.4 GHz.
The DevKit V1 uses a dual-core processor, so one core can read sensors while the other drives motors. Its 30-pin layout fits a breadboard or a small chassis plate.
Pick the SuperMini when space is tight, since it costs $9.99 and fits a small chassis. It comes in C3, C6, S3, and H2 versions with matching expansion boards.
Do you need a camera board or a plain board?
Add a camera board only when the car must see its path. The ESP32-S3-CAM costs $11.97 and carries an OV2640 2MP or OV5640 5MP camera.
The ESP32-CAM costs $25.99 and carries an OV2640 camera with 4MB of PSRAM. It suits video streaming over WiFi from the car.
A plain board costs less and leaves more pins free for motors and sensors. The DevKit V1 gives 30 pins with no camera attached.
How many pins does a robot car need?
A two-motor robot car needs at least 4 pins for the motor driver, plus 2 pins per line sensor. The DevKit V1 gives 30 pins, so it covers motors, sensors, and a display.
The ESP32-S2 Mini gives fewer pins than the DevKit V1 but still covers a small car. It carries 4MB of flash and 2MB of PSRAM with USB-C.
Count pins before you order, since a camera board uses pins for the camera. The S3-CAM keeps dual USB-C ports and a TF card slot for storage.
How does 3.3V logic affect your sensors and driver?
ESP32 boards use 3.3V logic, while many motor drivers and sensors expect 5V signals. Check each part for 3.3V input before you wire it.
The NodeMCU ESP8266 board runs at 3.3V too and adds a built-in 0.96 inch OLED display. It costs $11.37 and works with the Arduino IDE.
A logic level shifter bridges 3.3V and 5V parts when a sensor needs 5V. Test the shifter on the bench before you mount it in the car.
How do you power an ESP32 robot car?
Power the board from a 5V USB source or a regulator fed by the drive battery. The DevKit V1 takes Micro USB or Type-C input, so a USB battery pack works on the bench.
A TP4056 charging module charges a single lithium cell at 1A from a 5V USB source. Never charge a lithium cell without a proper charging module.
Keep motor wires away from sensor wires to cut electrical noise. A separate battery for motors and logic also cuts noise on a first build.
What code runs an ESP32 robot car?
The Arduino IDE compiles sketches for ESP32 boards through the Arduino-ESP32 core. Espressif documents the core with install steps and pin maps.
An ESP32 runs at up to 240 MHz, so it handles WiFi and motor control in one loop. The DevKit V1 runs the same core as the other boards here.
Start with a loop that reads two line sensors and sets motor speeds. Add the camera stream later, once the car drives straight.
Quick comparison
| Board | WiFi | Memory | Pins or display | Price |
|---|---|---|---|---|
| DevKit V1 | 2.4 GHz WiFi + Bluetooth | Not listed | 30 pins | $11.99 |
| SuperMini | WiFi + Bluetooth | Not listed | Compact | $9.99 |
| ESP32-S3-CAM | WiFi + Bluetooth | 16MB flash, 8MB PSRAM | OV2640 2MP or OV5640 5MP | $11.97 |
| ESP32-CAM | WiFi + Bluetooth | 4MB PSRAM | OV2640 camera | $25.99 |
| ESP32-S2 Mini | WiFi | 4MB flash, 2MB PSRAM | USB-C | $11.16 |
| NodeMCU ESP8266 | WiFi | Not listed | 0.96 inch OLED | $11.37 |
How do you wire an ESP32 robot car?
- Mount the board on the chassis with standoffs, clear of moving wheels.
- Connect the motor driver inputs to 4 board pins for direction and speed.
- Connect the line sensors to 2 analog or digital pins each.
- Power the board from 5V USB, then power the motors from the drive battery.
- Upload a test sketch that spins each motor forward and back.
Frequently asked questions
Can an ESP32 replace an Arduino Nano in a robot car?
Yes. The ESP32 adds WiFi on 2.4 GHz and Bluetooth, and it runs at up to 240 MHz. It uses 3.3V logic, so check that your sensors and driver accept 3.3V signals.
Which ESP32 board is smallest for a robot car?
The SuperMini costs $9.99 and fits a small chassis. It comes in C3, C6, S3, and H2 versions with matching expansion boards.
Does the ESP32-CAM need a separate programmer?
No. The ESP32-CAM board here uses micro USB, and the S3-CAM uses dual USB-C ports. Both work with the Arduino IDE.
How much flash does a robot car sketch need?
A small car sketch fits in 4MB of flash. The S3-CAM gives 16MB of flash and 8MB of PSRAM for camera code.
Parts used
ESP32 DevKit V1 Development Board, 30-Pin WROOM-32, WiFi + Bluetooth, $11.99. Original ESP32 DevKit V1 development board, 30-pin WROOM-32 with dual-core processor, WiFi + Bluetooth, in Micro USB or Type-C versions, with or without breakout board. Ships from NY, USA.
ESP32 SuperMini Development Board, C3 / C6 / S3 / H2 + Expansion Boards, WiFi + Bluetooth, $9.99. Compact ESP32 SuperMini development board, available in C3, C6, S3, and H2 versions with matching expansion boards. WiFi + Bluetooth for IoT and Arduino projects. Ships from NY, USA.
ESP32-S3-CAM Development Board N16R8 : Board, OV2640 or OV5640 Camera, 1/5/10-Pack, $11.97. ESP32-S3-CAM development board (N16R8: 16MB flash, 8MB PSRAM) with WiFi + Bluetooth, dual USB-C, TF card slot, and optional OV2640 2MP or OV5640 5MP camera. Board only or 5/10-packs. Ships from NY, USA.
ESP32-CAM Development Board with OV2640 Camera Module, 4MB PSRAM, $25.99. ESP32-CAM development board with OV2640 camera module, 4MB PSRAM, WiFi + Bluetooth, micro USB, and TF card slot. For IoT cameras, video streaming, and Arduino projects. Ships from NY, USA.
ESP32-S2 Mini Development Board, WiFi, 4MB Flash, 2MB PSRAM, USB-C, $11.16. ESP32-S2 Mini development board with ESP32-S2FN4R2, 4MB flash, 2MB PSRAM, and WiFi. USB-C, MicroPython and Arduino compatible, D1 Mini shield compatible. Ships from NY, USA.
NodeMCU ESP8266 Development Board with 0.96" OLED Display, ESP-12E, Micro USB, $11.37. NodeMCU ESP8266 development board (ESP-12E) with a built-in 0.96 inch SSD1306 OLED display, CH340 USB-serial, Micro USB, FLASH and RESET buttons. Works with the Arduino IDE. Choose white, yellow-blue, or blue display. Ships from NY, USA.
TP4056 5V Micro USB 1A Lithium Battery Charging Module (5 Pack), $14.99. TP4056 5V micro USB 1A lithium charging modules, pack of 5. Handy for bench charging single cells and small DIY packs. I check every module before it ships.
Microcontrollers and Development
Related buying guides on Quality RC Parts
Matching QRC guide: ESP32 board for a robot car
How to Choose the Right ESP32 Board for Your Project
How to Choose ESP32 Boards for Your Robotics Projects
Browse all the guides on the Quality RC Parts Drone Guides hub, or start at the Quality RC Parts store.
Sources
Quality RC Parts stocks parts in New York, USA and ships in-stock orders in 1-2 business days.
Last updated: 2026-11-10.